

Pipelines
A pipeline is a visual, multi-step workflow. Where an agent handles one task end to end, a pipeline breaks a process into nodes — agent calls, toolkit actions, decisions, and state updates — and connects them into a repeatable sequence.
The Pipelines page lists the project’s pipelines. Its toolbar has the search box, Filters (tags and authors, in the side panel), the card/table switch, Import and + New pipeline; see Page layout.
Create a pipeline
Section titled “Create a pipeline”Select + New pipeline in the Pipelines page toolbar, or the + next to Pipelines in the sidebar. Creation is two phases. First, fill in Name, Description, and optionally tags, a welcome message, conversation starters, and a step limit (default 25), then select Save — this creates the pipeline’s base version. Saving unlocks the second phase: a three-column editor with the configuration form on the left, the Flow/YAML editor in the center, and a live test chat on the right.
Attach toolkits, agents, MCPs, and nested pipelines
Section titled “Attach toolkits, agents, MCPs, and nested pipelines”In Tools, use +Toolkit, +MCP, +Agent, and +Pipeline to attach existing resources for the workflow to call. This section only appears after the first save.
Every pipeline starts with two built-in state variables: inputs (the triggering input) and messages (the conversation history). Add your own under State with a name and optional default value, then reference them in any node as {{state.variable_name}}. State Modifier nodes read and write state during execution.
Design the workflow
Section titled “Design the workflow”Toggle between Flow and YAML at the top of the center panel. In a narrow window the chat panel, and then the configuration panel, start folded so the canvas stays at least 480px wide; select » or « on a folded panel to open it.
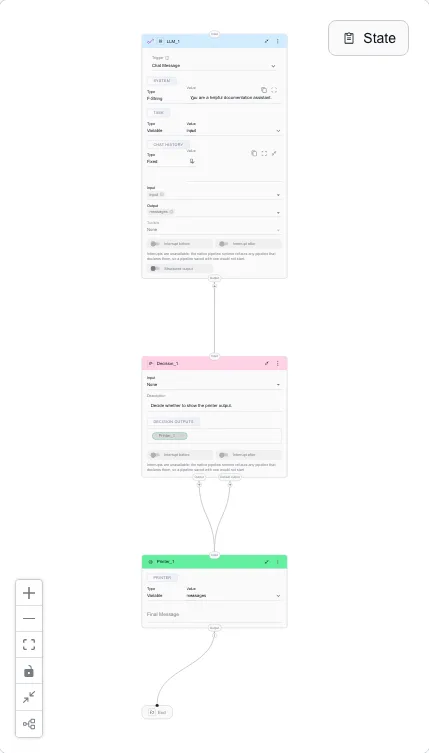
Add a node with +, choose its type, and connect nodes by dragging between their connection points. See Flow editor and the pipeline node reference for what each node type does and which ones the runtime actually executes.
Edit the same workflow as YAML for advanced control, bulk changes, or replicating an existing pipeline. See YAML editor.
File attachments
Section titled “File attachments”Turn on Attachments in Modules to let users upload files in a pipeline conversation. Elitea adds an input_attachments state variable automatically (and removes it if you turn attachments off) and injects a file-storage toolkit at execution time — no manual toolkit setup needed.
Test and execute
Section titled “Test and execute”The embedded chat panel lets you pick a model, adjust its settings, and run the pipeline interactively. Each execution is captured as a pipeline run with its inputs, outputs, and state changes; when context management is on, a Context Budget widget tracks token usage during the run. See Pipeline runs.
Versions, publishing, export, and fork
Section titled “Versions, publishing, export, and fork”Pipelines version, publish, export/import, and fork the same way agents do — select Save As Version to branch, use the version dropdown to switch, and reach Export, Fork, and Publish from the toolbar’s overflow menu. See Entity versioning, Import/export, and Forking.