

Agents
An agent combines instructions, a model, and optional toolkits and skills into a reusable assistant. This page covers the Agents menu end to end; for the underlying concept, see What is an agent.
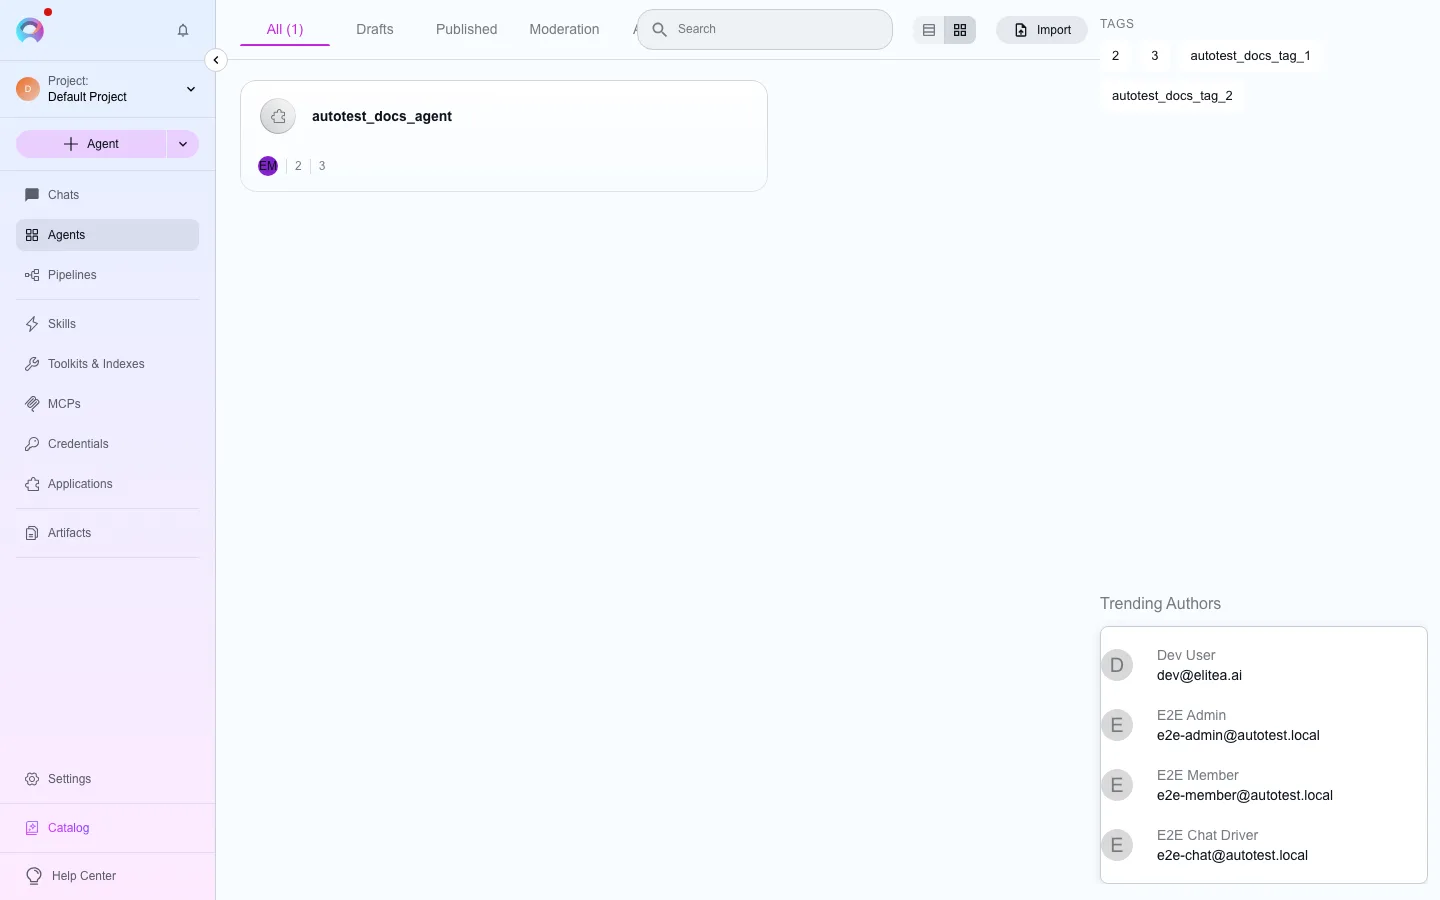
The Agents page lists the project’s agents. Its toolbar has the search box, Filters (tags and authors, in the side panel), the card/table switch, Import and + New agent; see Page layout. The My liked and Trending tabs are hidden until they are supported.
Create an agent
Section titled “Create an agent”Open the form
Select + New agent in the Agents page toolbar, or the + next to Agents in the sidebar.
Fill in General and Instructions
Name and Description are required; Instructions define the agent’s behavior. Tags, a welcome message, and up to four conversation starters are optional.
Save
Saving creates the agent’s first (“latest”) version and opens its full configuration page: a form on the left, a live test chat on the right.
Attach toolkits, agents, MCPs, and pipelines
Section titled “Attach toolkits, agents, MCPs, and pipelines”In the Tools section, use the +Toolkit, +MCP, +Agent, and +Pipeline buttons to attach existing resources; each opens a searchable picker with a Create new option that takes you to that resource’s own creation form. Changes save automatically.
Skills
Section titled “Skills”Attach up to five skills per agent version from the Skills section. Each attached skill uses its base version by default; select the version name on the card to switch to a different one. The Skills section is hidden when the Public project is selected.
Modules
Section titled “Modules”Built-in modules — attachments, image creation, data analysis, planner, smart tools selection, swarm mode, and the platform’s own MCP tools — turn on in Tools › Modules. Image creation, swarm mode and the platform’s MCP tools show disabled with a reason: the platform’s worker does not run them. See Internal tools.
Instructions, variables, and mentions
Section titled “Instructions, variables, and mentions”Type / in Instructions to mention a toolkit, MCP, agent, or pipeline already attached to the agent, and ~ to mention an attached skill. A {{variable_name}} placeholder in Instructions automatically adds a matching input field to the Variables section.
Editor notes
Section titled “Editor notes”A free-text Editor Notes field records internal context about the current version — it is never sent to the model or used during execution.
Output contract
Section titled “Output contract”In Advanced, Output contract sets a rule for the agent’s final answer: a JSON Schema, a regular expression, or a named format (json, markdown or csv). The worker validates each final answer. If an answer is not valid, the worker asks the model one more time, with the validation error. If the second answer is also not valid, the run stops with OUTPUT_CONTRACT_VIOLATION. An agent with a contract shows its answer only after the answer is validated. Select None to remove the contract. See Output contracts.
Require citations
Section titled “Require citations”In Advanced, Require citations tells the agent to cite the tool results that it uses, as [1], [2]. The chat then shows under each answer how many sources the answer cites and how many statements have no citation. This is not a confidence score. A cited source does not prove that the source supports the statement. See Grounding indicators.
Test the agent
Section titled “Test the agent”The embedded chat panel on the right lets you send messages, pick a model and its settings (Reasoning for reasoning models, Creativity for standard ones, Max Completion Tokens), and iterate without leaving the page. When context management is on for the project, a Context Budget widget appears above the panel after the first message.
Versions
Section titled “Versions”Selecting Save again updates the current version. Use Save As Version to branch off a named version instead — version names must be 48 characters or fewer, without spaces or underscores. From any version you can Delete, Execute, or switch versions from the version dropdown. See Entity versioning.
Publish, export, import, and fork
Section titled “Publish, export, import, and fork”- Publish a draft version through a guided wizard with automated AI validation, making it visible in Catalog. See Agent publishing.
- Export downloads the selected version as a single
.mdfile, or a.zipif it references nested agents. - Import an exported file from the Agents page toolbar.
- Fork copies the selected version into another project you choose.
See Import/export and Forking for full detail; toolkit credentials must be reconfigured manually after either operation.
Evaluation
Section titled “Evaluation”A saved agent’s editor includes an Evaluation tab to define what “good” looks like for that agent, run it against test cases, and see how it scored.
History
Section titled “History”A saved agent’s editor also includes a History tab: every past conversation that used this agent, newest first, with its date, a derived duration, and its message count. Select a run to see its recorded trace — the tool calls and thinking steps the runtime logged for that conversation. An agent with no past conversations shows an empty state rather than a blank panel.